Creating A Blog Post: The Basics
Hello, and welcome to welcome the W³P Lives tutorials on creating a post. In this first tutorial we'll cover the basics of creating a blog entry.
So, you've submitted your email, accepted the invitation and now your a contributor. Now what? The blog consists of two sections: the viewer section and the admin section. The admin section is where everything happens behind the scenes, and this is where a discussion is created. When you accepted your invitation to be a contributor, what happened is that you were given limited admin privileges which allow you to create new discussions. You can get there by going to blogger.com or by following the "start a post" links on the homepage. Now, since that's out of the way let's get started.
1. Login to BLOGGER.COM using the gmail you submitted.
2. Look at which blog you are currently on and make sure that you have W³P Lives chosen.3. Click New post.
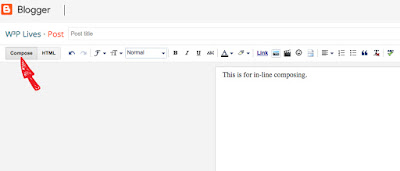
Alright, now we're in the post editor. So let's go over what we see in here. The first thing to take note of is that there are two sections, one for composing and the other for editing the html of the post.
 The "Compose" section is where the bulk of your post will be created. In this section you can write, paste copied content, and arrange your post to make it look and read how you want. (We will be going over the tools for this section in the next tutorial)
 The "HTML" section is where
 you can adjust the html code for your page. If you don't like using the tools, this is where you can manually add code or delete portions of code that carried over if you copied text directly from a website. This is also where you will post the "embed" code from twitter posts and other media that provides a code for embedding content.
 These two sections are where all of your work will be done. As you work on your post there is a "Preview" button that you can use to check how your page will view when it is published. It is recommended that this be done as you put your post together so that if you have something that is going to post abnormally, you can catch it right when it is added and fix it without messing up what comes after it. After you're satisisfied with your post simply click on "Publish" and you're post will show up on the blog.
That's all for this first tutorial. You should be able to login, start a new post, preview your post, and publish. In the next tutorial we will go over the tools in the post editor so that you can customize your post.


